Tuesday, 15 April 2014

Tutes Cute Tuesday - Make A Custom Felt Bunny Family

I found this cute tutorial just in time for Easter and I am so in love with the cuteness of it all (and the fact it's no sew too!)  This tutorial comes courtesy of While Wearing Heels, whose blog name I love!  So I'm off to buy felt and embroidery hoops and put this on the to do list for the long weekend.  See a snippet of the details below but head to While Wearing Heels for the fine print.

Thank goodness Mommy Bunny was having a good hare day.

Moving on to Daddy bunny, who won Mommy bunny over with a 24 carrot ring. 

And, last but certainly not least, Baby Bunny.  Baby Bunny enjoys spending her day playing hopscotch.


Happy Easter xx

Friday, 11 April 2014

Fat Mum Slim Photo a day Friday - March

I have taken upon myself a daily photo challenge over at Fat Mum Slim, which for the first few months was pretty awesome.  It makes you look at the world a little differently (not in a crazed I need to take a photo way but more of a lets look around and see what the world is doing today, and if there's a cool photo opportunity well that's even better.)

If you read this blog post you may also be inspired - it inspired me for 2014.  And you will also read it's inspired a lot of other people too.  It's pretty easy, you read the day's photo challenge and their prompts to give you some tips and hints for the photo.

I thought I would share my top 10 from each month with you to show off a little (and keep me motivated).

However March, has been a bit of a let down.  I took my eye of the ball and ended up getting so far behind I kind of fell off the Photo a Day wagon.  Whoops.

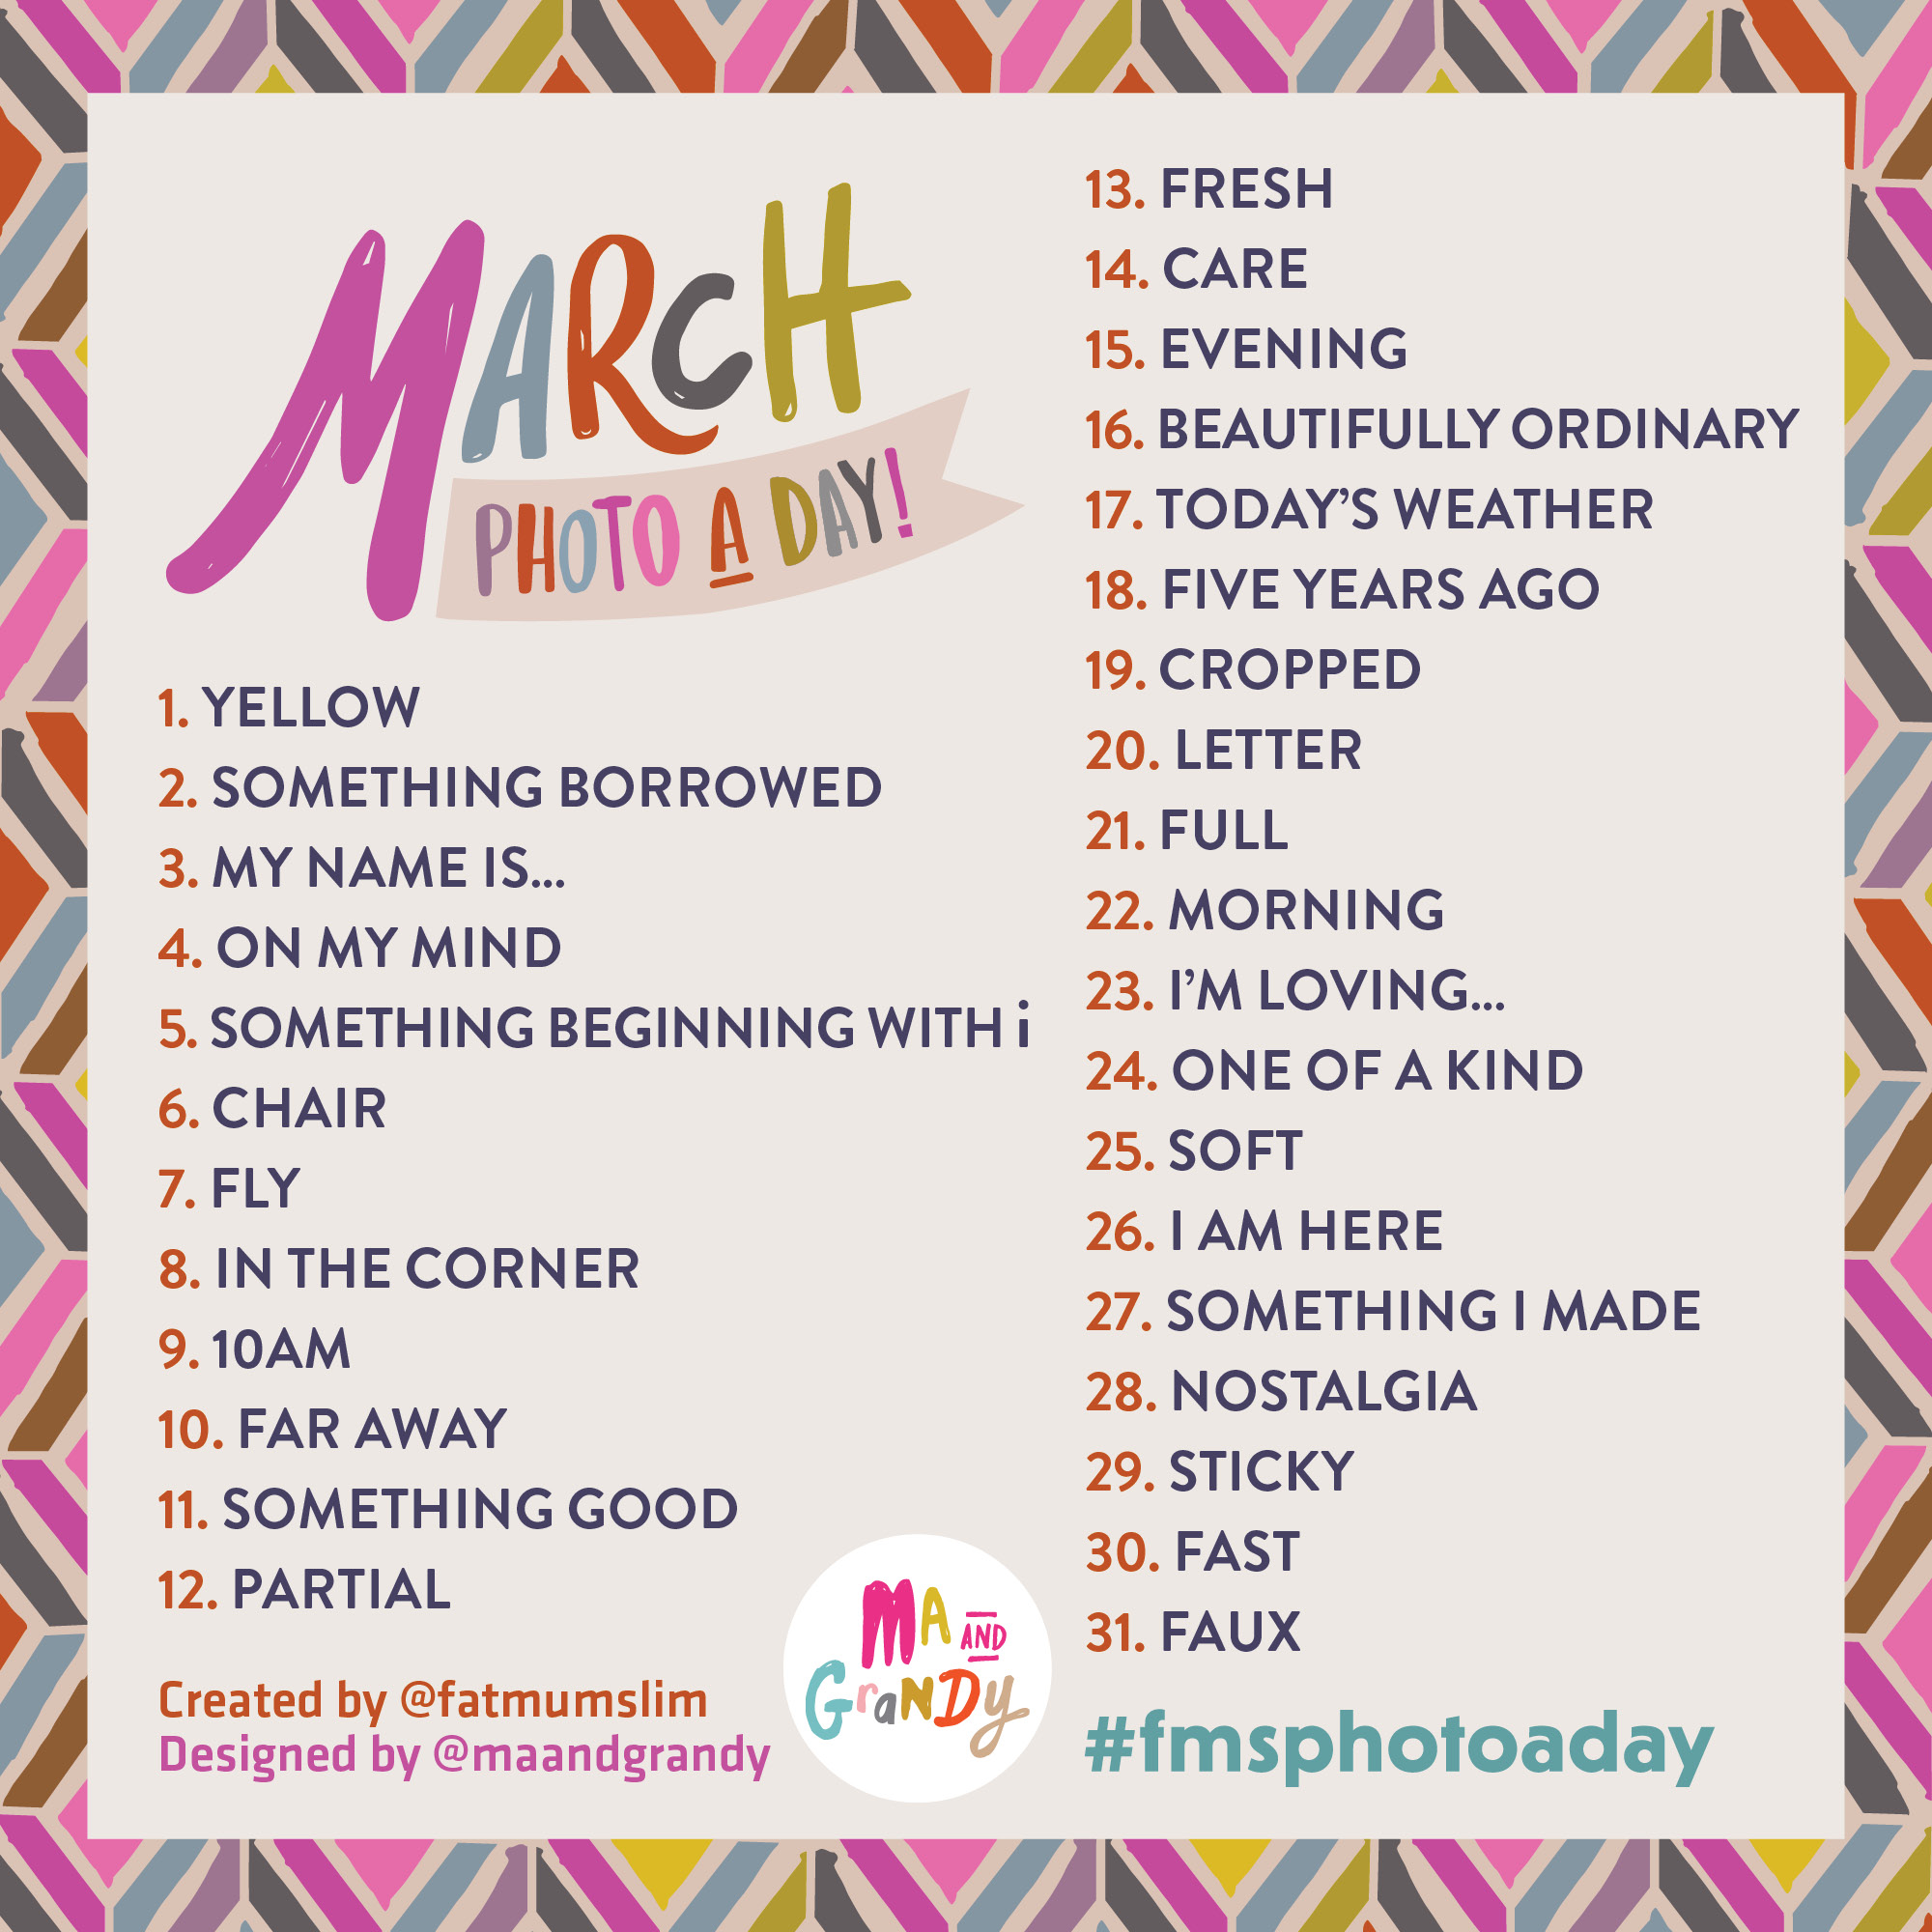
MARCH Photo A Day 2014. Join us?

I do have some photos to show you though................

March 1st - Yellow


March 3rd - My name is.....Supermum some days

March 6th - Chair, who needs a chair when you can lie on the floor?

March 9th - 10am

March 12th - Partial

March 14th - Care

March 16th - Beautifully Ordinary...........Sand

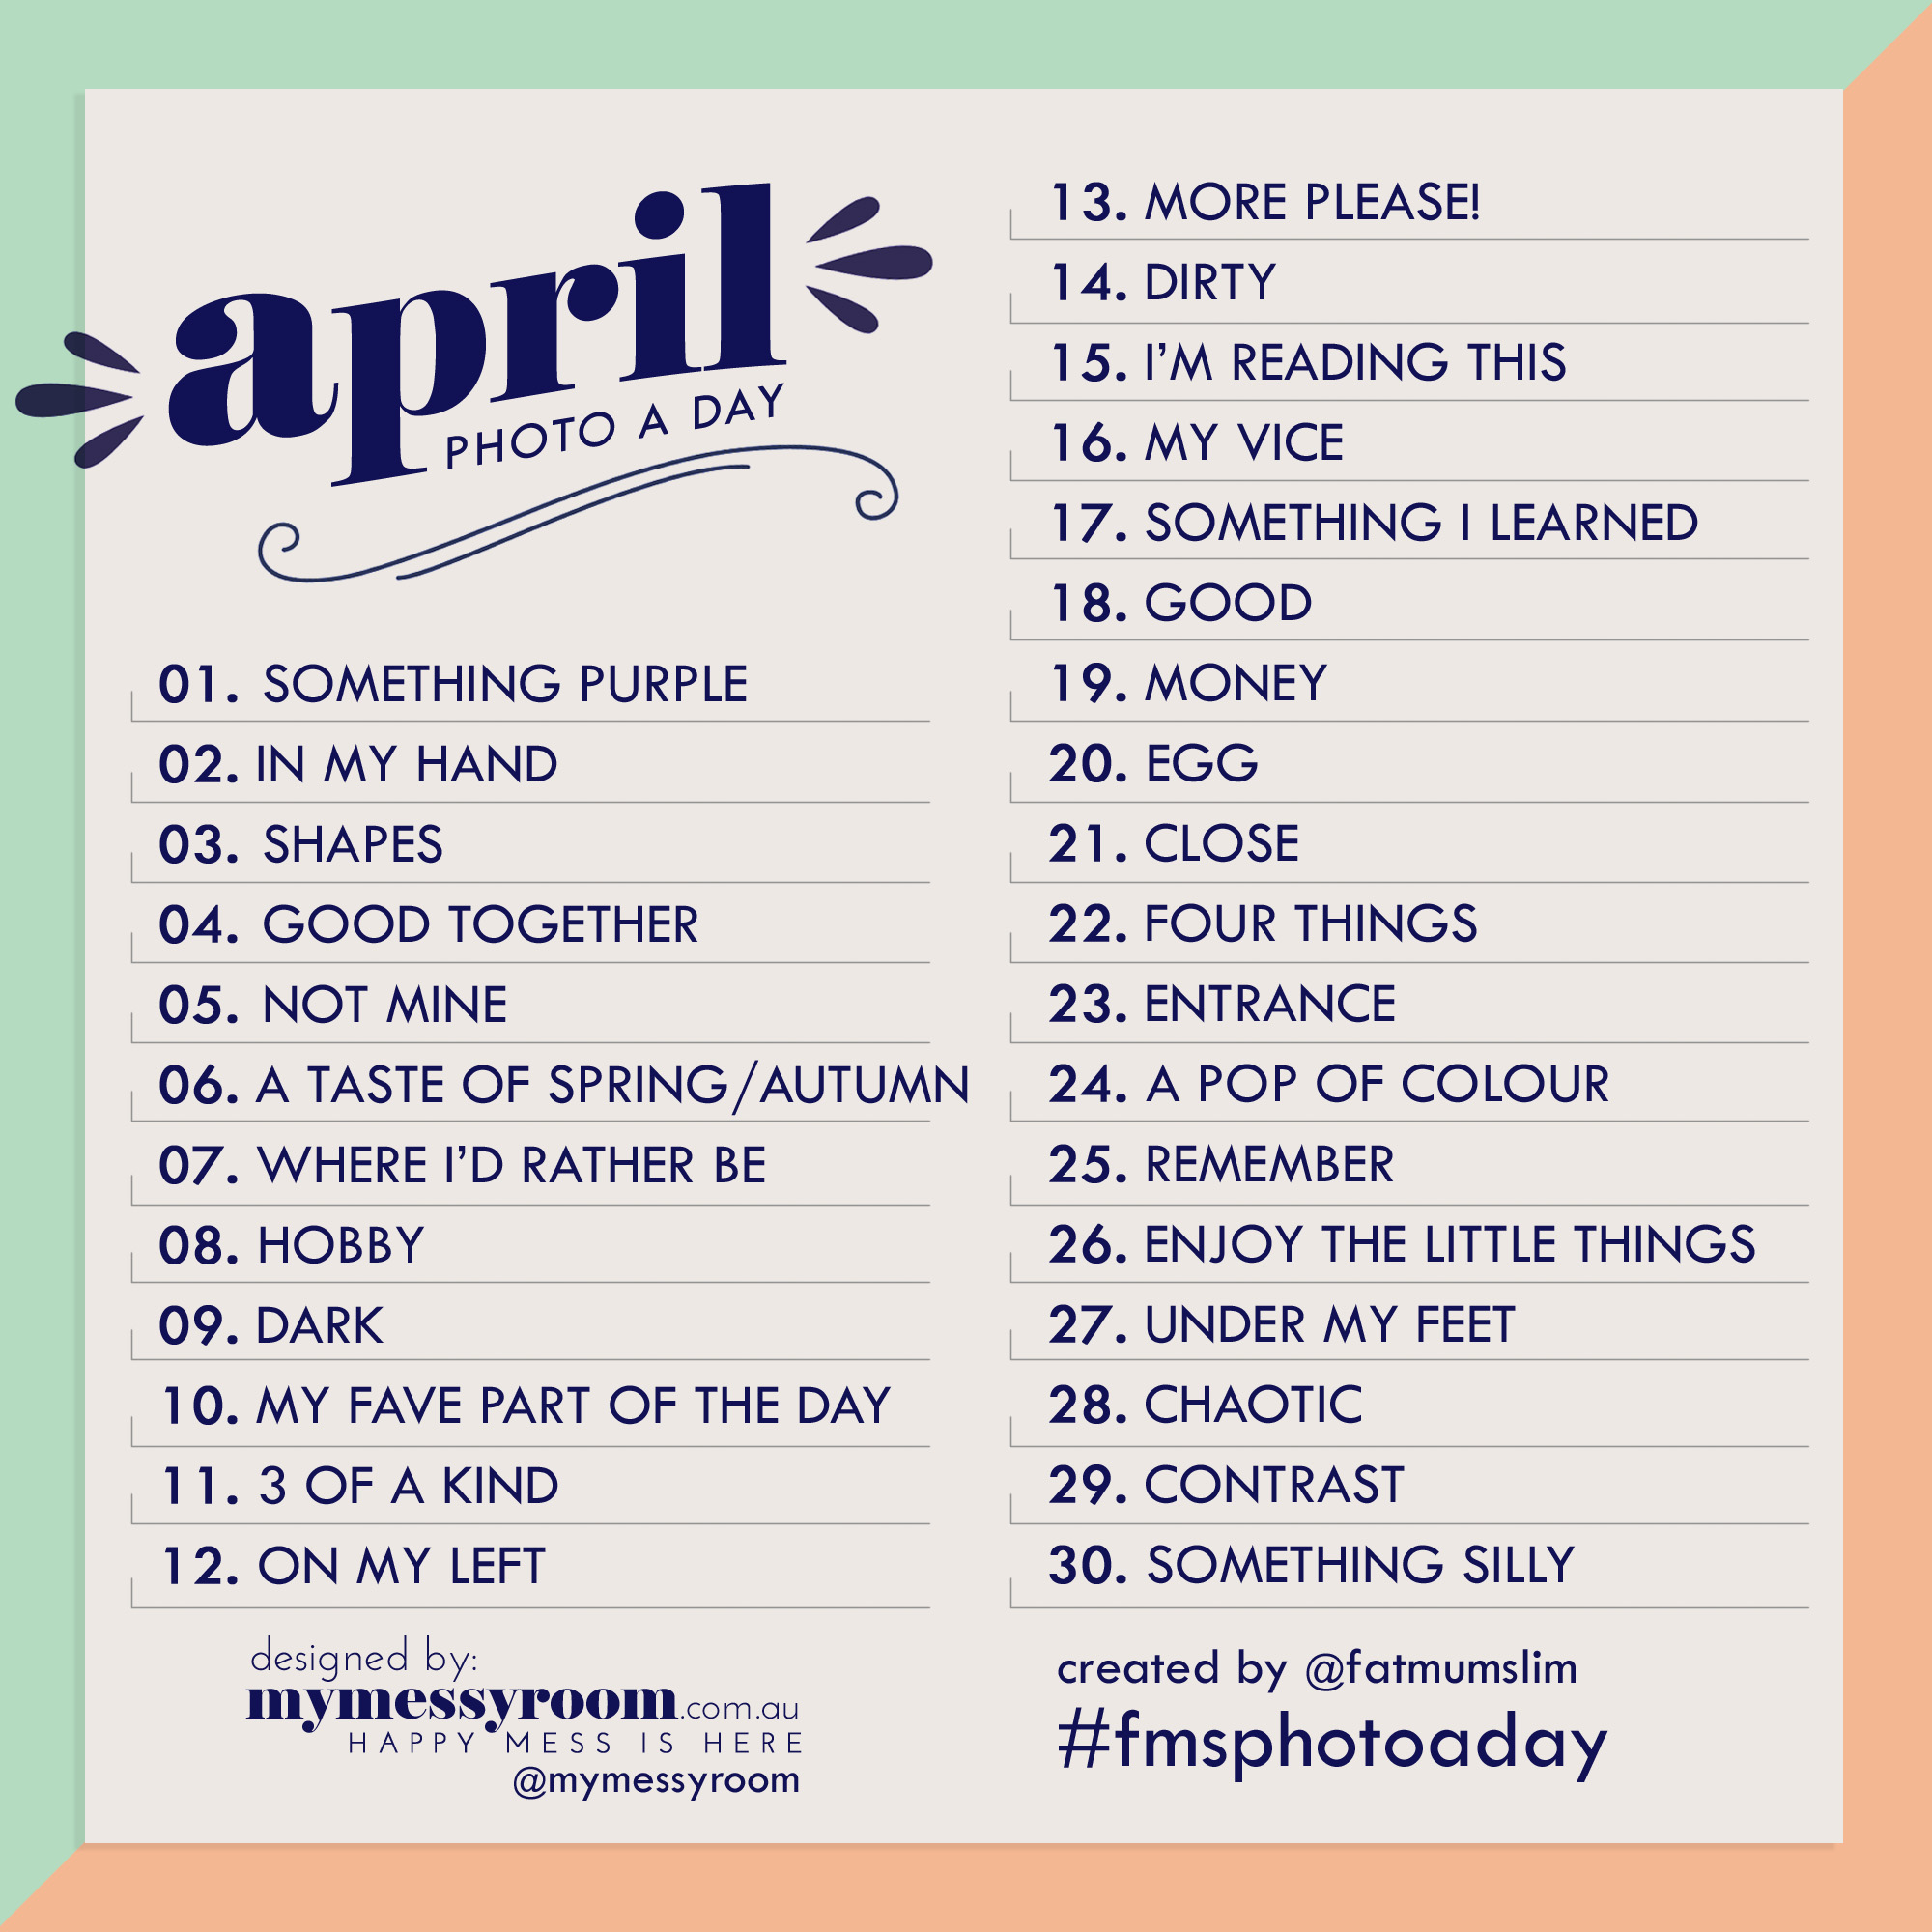
Coming up next month.................and hoping to have more to show you is.........

APRIL photo-a-day1

Wednesday, 9 April 2014

21 Sugar Free Easter Crafts, Keepsakes and Gift Ideas

Source
Seeing as I'm all about a 'lets not give Miss 2.5 copious amounts of Easter eggs and chocolate' *Easter this year I thought I would share with you some Easter gifts and crafts that are on my (and could be on your to do list) this Easter. Non chocolate gifts and keepsakes are a great way for Easter to be an all year round experience and not just a one off and the crafts are a great way to break up a long weekend especially if the weather turns pants.
*I'm not saying there will be no chocolate this Easter, I just don't want it to turn into a sugar crazed fest that involves huge highs and crashing lows and that's just the parents.

Easter Crafts


  1. Sock egg hat Tutorial
  2. DIY Playdough surprise eggs (this one is a MUST!)
  3. Mr & Mrs Egg Decorating
  4. Sleepy Bunny goody bags Tutorial
  5. Egg Shaped Chalk Tutorial
  6. Thumbprints Egg Dyeing Tutorial 
  7. Bunny Tail Bunting


Easter Keepsakes

  1. I Love You to the Moon & Back Heart

    1. Bunny in a Bottle Necklace
    2. Easter themed books -check out this competition on Kiwi Families to win some
    3. Bennett Bunny
    4. Clementine Rabbits Frame
    5. Wooden Bunny Egg Cup
    6. Bashful Bunny

    Easter Gift Ideas


    1. Easter Bunny Hat
    2. Sleepy Bunny Hair Clips
    3. Knitted Hot Cross Buns
    4. Easter Bunny House Shoes
    5. Wooden Bunny Ear Teething Ring
    6. Country Road Bunny Knit
    7. Beautiful Bunny Crayons


    Easter Giveaway


    I have a 3D Bunny Cookie Cutter to give away from Making It! which would be a perfect for any Easter themed baking or crafts you have planned for the long weekend.  

    GIVEAWAY DETAILS

    Tell me in the comments below what you're planning to do this Easter that is sugar free

    - one comment per person
    - you must live in New Zealand
    - giveaway closes on Monday 14th April

    For an extra entry head to the Making It! facebook page and have a look around, and click like while you are there.

    IMPORTANT 

    - make sure there is some way for me to contact you! Leave an email, or have your name clickable to a profile or something.  If there is no way for me to reach you then I'll have to draw another entry!! This has happened previously, so I wouldn't like to do this and disappoint someone!


    Monday, 7 April 2014

    My Inspiration Monday - Making it!


    How did your business come about?
    ‘Making It’ was started because my partner (Josh) and I (Cynthia)  like making things. We started thinking about things we could design, make and sell from home - things that would showcase our design talent. We purchased a Makerbot 3D printer and started exploring what we could make.

    What is 3D printing?
    3D printing, also called additive manufacturing, means making things layer by layer according to a 3D design file. This differs from traditional manufacturing, such as machining, which often involves subtracting a material in order to achieve a certain shape.

    How long have you been making cutters for? 
    We made our first ladybug cutter for my daughters 1st birthday at the start of 2013, we had a ladybug party theme. Our friends and family loved the idea, so I started designing more cookie cutters.  We then started making cookie cutters for sale in mid 2013.


    I signed up to have a stall at the Bambino Market to test the popularity of our cookie cutters. Then I got busy designing and printing cookie cutters. Each cookie cutter takes 1.5 to 2 hours to print, so I had the printer going everyday for a few weeks. I started getting requests for custom cookie cutter shapes too (mostly corporate logos and characters for birthday parties so far).


    Where did the name come from? 
    The name 'Making It' was kinda made up on a whim. I started making kids coats (upcycled from woollen blankets) and appliqué kids t-shirts after having trouble finding a warm coat and interesting t-shirts for my daughter. The name fits in with the wide range of things we make.


    Where does your inspiration come from?
    I make cookie cutter designs that my daughter and I would like. Since she has started talking and loves animals I get lots of inspiration. I also get asked for certain shapes, especially since having stalls at a few craft markets.

    What do you love about what you do? 
    I love that I can use my graphic design and illustration skills to produce something my customers like and enjoy using.


    Where do you find time to craft? 
    My daughter has started daycare a few days a week and she still has an afternoon nap. And I find time to create more cutter designs between freelance graphic design projects.

    What’s next for you? 
    We would like to explore other things we can print on our 3D printer. I'd like to design a website to sell our cookie cutters directly and especially promote the fact that we can create custom designed cookie cutters. 
    Our cutters are available in the HAPA store in the Re:Start Mall and I would love to see them in a few more crafty/gift stores.


    You can find more of Making It! here on their facebook page and here on Felt,  Make sure you have a look at all their designs.  And keep an eye of this little guy who will be part of our Easter giveaway -


    And it wouldn't be a post about cookie cutters without a cookie recipe!  Check out Cynthia's Gingerbread Cookie Recipe - 

    Gingerbread Cookie Recipe
    This is the yummiest Gingerbread Cookie Recipe I have found, and I've tried lots. :)
    Ingredients
    125g butter
    3/4 cup golden syrup
    1 cup sugar
    3 cups flour
    3 Tbsp ground ginger
    3 Tbsp ground mixed spice
    1 Tbsp ground cinnamon
    1 tsp baking soda
    2 Tbsp milk

    Method
    Preheat oven to 170°C.
    Melt the butter, golden syrup and sugar in a large pot and bring to the boil. Boil rapidly for several minutes and stir as it boils.
    Sift the flour, ground ginger and ground mixed spice into a large bowl. Pour melted butter mix into the dry ingredients and mix to combine.
    Mix baking soda and milk in a cup and pour into the dough, stirring until it is well combined. Rest dough for 5-10 minutes covered in cling film. (I find the mixture is really hot and I put it in the fridge)
    Roll out on lightly floured board (5-6 mm thick). Use cutters to cut various shapes. Put onto baking paper and bake for 10-15 minutes.

    Recipe altered from www.greggs.co.nz

    Images used with the kind permission of Cynthia Packman

    Wednesday, 2 April 2014

    Easter Inspiration - 36 Sugar Free Easter egg fillers


    It’s inevitable that with a celebrated occasion like Easter that there is ALOT of sugar on offer for the kids.  It seems there are aisles dedicated to Easter in every store, and that’s just in January! Marshmallow treats, chocolate bunnies, eggs in every size colour, flavour and favourite TV character imaginable.  They say everything in moderation so this Easter why not try reducing the sugar overload when organising your Easter egg hunt by trying some of these sugar free Easter egg alternatives.  Now I’m not suggesting a completely sugar free Easter, I'm not that deluded silly to know that there will inevitably be chocolate on offer for Miss 2.5. I’m just saying there are other options out there for your Easter egg hunt which are toddler-friendly and fun.  Plastic eggs can be bought from most dollar stores and filled with relatively inexpensive treats.  Try these different ideas for each age group.


    Babies
    It’s up to you if you would like to take your little one on an Easter egg hunt around the garden, if you have an older child then it might be nice to have both of them hunting for eggs.  A little bit of teamwork on the older children’s part might be nice in helping their younger sibling find their eggs. 

    1.      Finger puppets
    2.      Hare Bib
    5.      Bubbles

    Alternatively you could package the eggs or the smallest member of your family in an upcycled egg carton like this one -


    Toddlers


    6.      Stickers or stamps
    7.      Alphabet magnets spelling their name
    8.      Chalk or Crayons 
    9.      Cute Erasers
    10.  Cute wooden bunny pegs
    11.  Playdough
    12.  Food – cute animal crackers, trail mix, fruit or fruit nuggets
    13.  Bouncy balls
    14.  Magic grow capsules
    15.  Slime or Silly putty
    16.  Toys like  cars, animal figurines, Lego figurines
    17.  Balloons
    18.  Hairclips

    Kids


    19.  Puzzle pieces- put the puzzle together to make sure you got all the eggs
    20.  Temporary tattoos
    21.  Lip Balm, Nail polish, Hair chalk
    23.  Friendship bracelets
    24.  Shoe charms
    26.  Paratroopers
    27.  Jewellery
    28.  Coupon
    29.  Headphones

    And lastly don't forget Mum & Dad


    30.  Hipster Bunny Rambo tote bag (to collect your eggs)
    32.  White Rabbit cufflinks


    Happy Easter xx

    Tuesday, 1 April 2014

    tutes cute tuesday - autumn leaf alphabet tutorial


    We ventured to the Botanic Gardens today and enjoyed the beginnings of Autumn.  Crunching the leaves, trying to climb trees, smelling the last of the roses and looking at all the pretty autumn colours.  Heading home with a handful of leaves and a tired Toddler I wondered what we could do with our leaves.  

    Cue Autumn Leaf Alphabet!  Check out the full tutorial here or the basics are below -


    MATERIALS

    • Leaves
    • Heavy paper
    • Glue stick

    STEPS

    1. STEP 1

      ka99976_fal03_leafalpha_ht1.jpg
      Collect leaves, avoiding ones with any mould or rot. Lay leaves flat between phone-book pages or layers of newspaper, then weight them with something heavy. Allow one to two weeks to fully flatten and dry. 
    2. STEP 2

      ka99976_fal03_leafalpha_ht4.jpg
      Arrange leaves on a page of heavy paper. Experiment with combinations of colours and shapes. If you are stumped by a letter of the alphabet, look in the dictionary for words to illustrate. Embellish leaves by cutting notches for parts like mouths, tails, and fins. From spare leaves, cut out details like eyes, wheels, hats, etc.
    3. STEP 3

      ka99976_fal03_leafalpha_ht3.jpg
      Glue leaves into place with glue stick or white glue.  Lay a clean sheet of paper on top of glued leaves and rub gently to smooth and flatten. Carefully remove the top sheet.
    4. STEP 4

      ka99976_fal03_leafalpha_ht2.jpg
      Label the artwork. An adult can use a pencil to sketch in guidelines for the letters and the word; a kid can then write them in ink. When it is complete, try to keep the artwork flat, because pressed leaves can be brittle. Display collages on a bulletin board or wall. If this is a class project, you can make a colour photocopy of everyone's finished work and collect the pages to make a big alphabet book.

    Here is some inspiration to get you started for your alphabet letters, follow the links for further instructions or tutorials.


    6. Foxy Family
    7. Foliage Friends
    8. Bird of Paradise
    9. Owl
    10. Butterflies
    Happy Creating!


    Tuesday, 25 March 2014

    Market Mashup - Lost & Found Market & Anissa Victoria's Vintage Market


    The Lost & Found Market in conjunction with the Anissa Victoria's Vintage Market took over the Pallet Pavilion on Saturday (which sadly on a side note is being deconstructed next month - you can read about it here). It was a lovely autumnal day on Saturday, perfect weather for a market, and so nice to be outside, not too hot and not too cold, although the wind was a little windy at times!    I found lots of crafty things worth a mention, as you will see below there are some very creative and talented people out there, make sure you head to their pages to check them out, say hi and see anything else they might have.  Market season quietens down a little now, although there are still some events on the Market calendar which can be found here, although keep checking back as I'm sure some of this information is not 100% accurate.
    Thanks to all the lovely Stallholders I met and caught up with again, letting me take photos and generally just stalking you, it was nice to chat and get inspired and 'catch' the Market bug again after having taken a sabbatical. I look forward to seeing more of your creative endeavours, so keep calm and craft on.

    for the little ladies


    1. Rainy Day Pants - Michael & Maisie
    2. Bunny Softies - Baby Bird
    3. 3D Cupcake Cookie Cutter - Making It!
    4. Bookhouse - Remember When You Used To Be A Rascal
    5. Coin Purse - The Hope Tree
    6. Letter Bunting - Ameliorate Designs
    7. Little Doggies - Ameliorate Designs

    for the lads


    1. Fleecy Houses Leggings - Chasing Will
    2. Suburban Flags - Remember When You Used To Be A Rascal
    3. Yellow Cross Slouch Beanie - MumMa
    4. Dino Panel - Fabric Fixation
    5. Tassel Loafer -MumMa
    6. Little Sailor Romper - Goldie Clothing

    for the mums & dads

      
    1. Bicycle Cushion - Ameliorate Designs
    2. Vintage Shirt & Tie Bunting - R.L.S Arthouse
    3. Bunting Necklaces - Genevieve Robinson 
    4. Creepy Twins - Sh*ts about to get dainty
    5. Hungry Apology Stitch - The Queen Stitch
    6. Tangram & Tessellation Necklaces - Pandemonium
    7. Cone Cushion - Kotsu Designs